
DIY Adjustable RPTC Hangboard Mount with French Cleat
Ever since I first conceived of the Rock Prodigy Training Center, I’d been dreaming up a simple, adjustable mounting system. After RPTC launched, Julian Marks suggested using a French‐cleat system—two angled boards that hook and slide—to make instant spacing changes between hangboard halves.
The French Cleat Concept
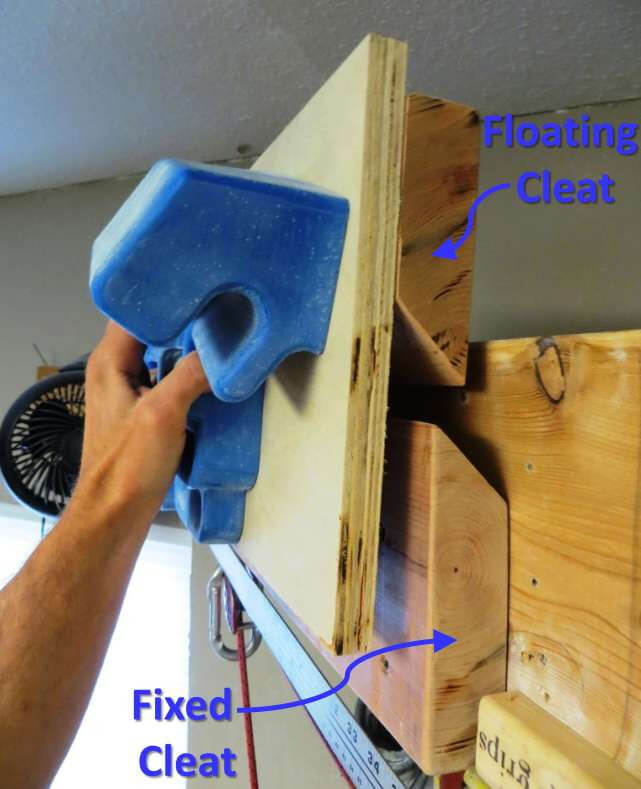
I was skeptical about its rigidity—any flex could ruin consistent loading—but after building a prototype, the mount was rock solid and unbelievably easy to adjust. Here’s a quick demo:
Tools & Materials
Required Tools
- Drill
- Circular saw (rigid blade)
- Level
- Clamps
- Tape measure
- Safety glasses & gloves
Optional Tools
- Table saw
- Electric sander
Materials
- 2×8 (or 2×6/2×10) lumber, ≥8 ft long
- 2×4, same length
- 1×4, same length
- Scrap 2×4 pieces
- ¾″ plywood, ~2 ft²
- 8 × 3″ wood screws (#8+)
- 6 × 2.5″ wood screws (#8+)
- 2 × 1.25″ wood screws
Building the Cleats
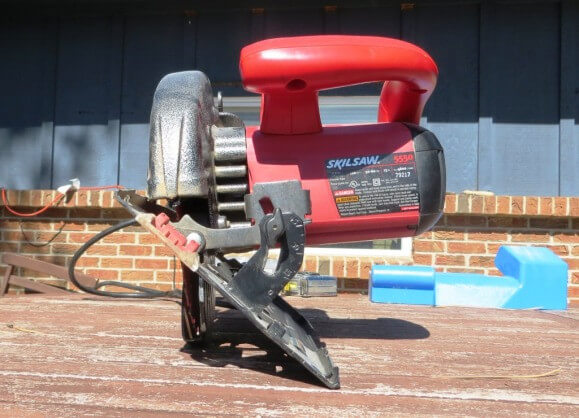
I ripped the 2×8 at a precise angle—5.5″ for the fixed cleat, 5.0″ for each floating cleat—using a circular‐saw fence jig. Make your rip at least 6″ longer than needed, then trim to final length.
Once cut, sand the mating surfaces smooth to eliminate wobble.
Guide Fence & Rip Cut Tips
Clamp a 2×4 (plus optional 1×4 shim) as a fence on your 2×8, then:
- Plunge the blade 2″, back out, then restart to seat the guide flat.
- Apply firm downward pressure into the fence.
- Proceed slowly for a straight, wobble-free cut.
Final Assembly
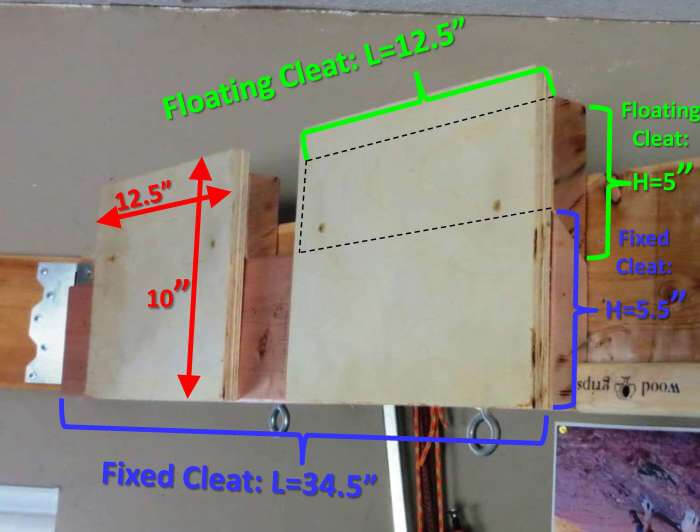
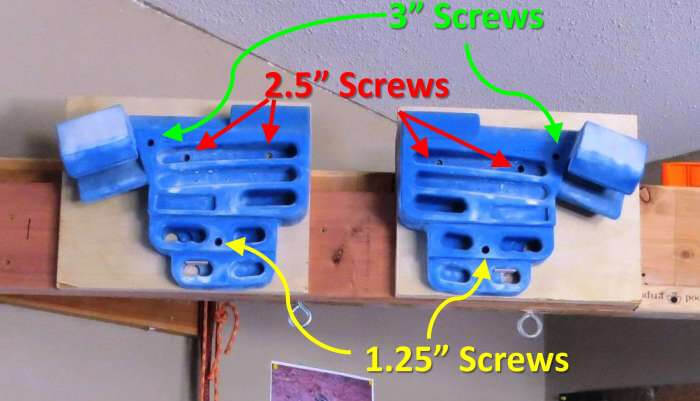
Trim the fixed cleat to ~34.5″ (for 0–9.5″ spacing). Mount it level to your wall or beam with at least six long screws. Slide on your two floating cleats, attach plywood rectangles (12.5″×10″) to each, then fasten each RPTC half to its plywood using the screw lengths shown below.
Scribe a ruler on your fixed cleat for repeatable spacing, log your settings, and you’re ready to train!